This colonial home had served its owners well for decades, but the original cedar clapboard siding was well past its prime. Warped boards, peeling paint, and — once we started stripping — significant rot in the plywood sheathing underneath. The homeowners wanted a fresh start that would last, and Peak Exteriors delivered a complete exterior transformation.
The Challenge
Cedar clapboard siding has a classic New England look, but it demands constant upkeep. On this home, years of moisture infiltration behind the aging cedar had taken a toll on the underlying structure. We knew from our initial inspection that this wouldn't be a simple re-side — it was going to require careful structural repair before any new siding could go on.
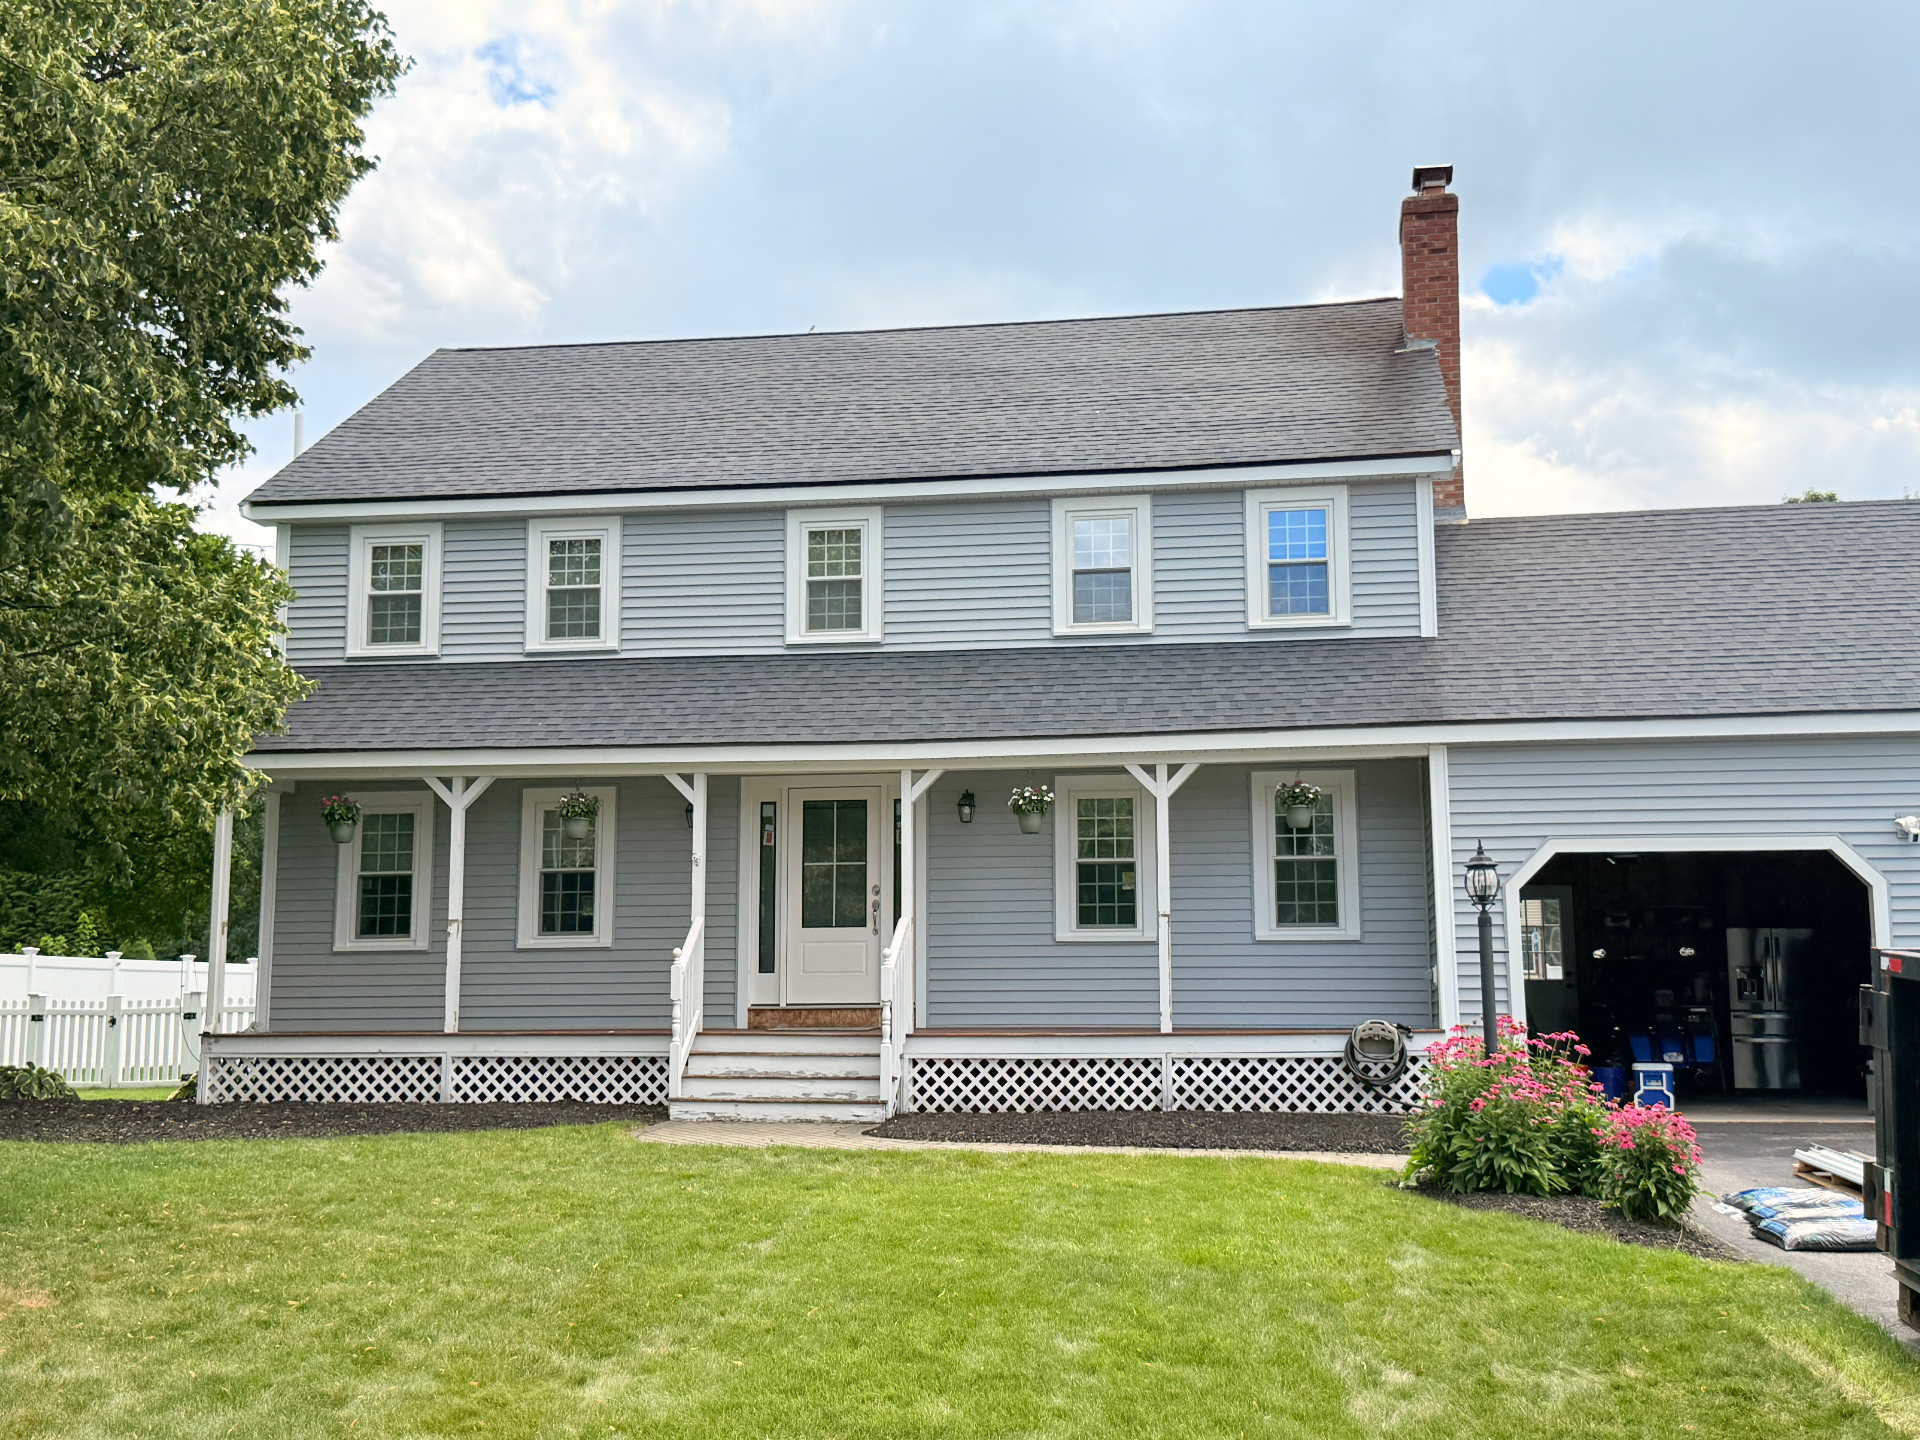
Front of house

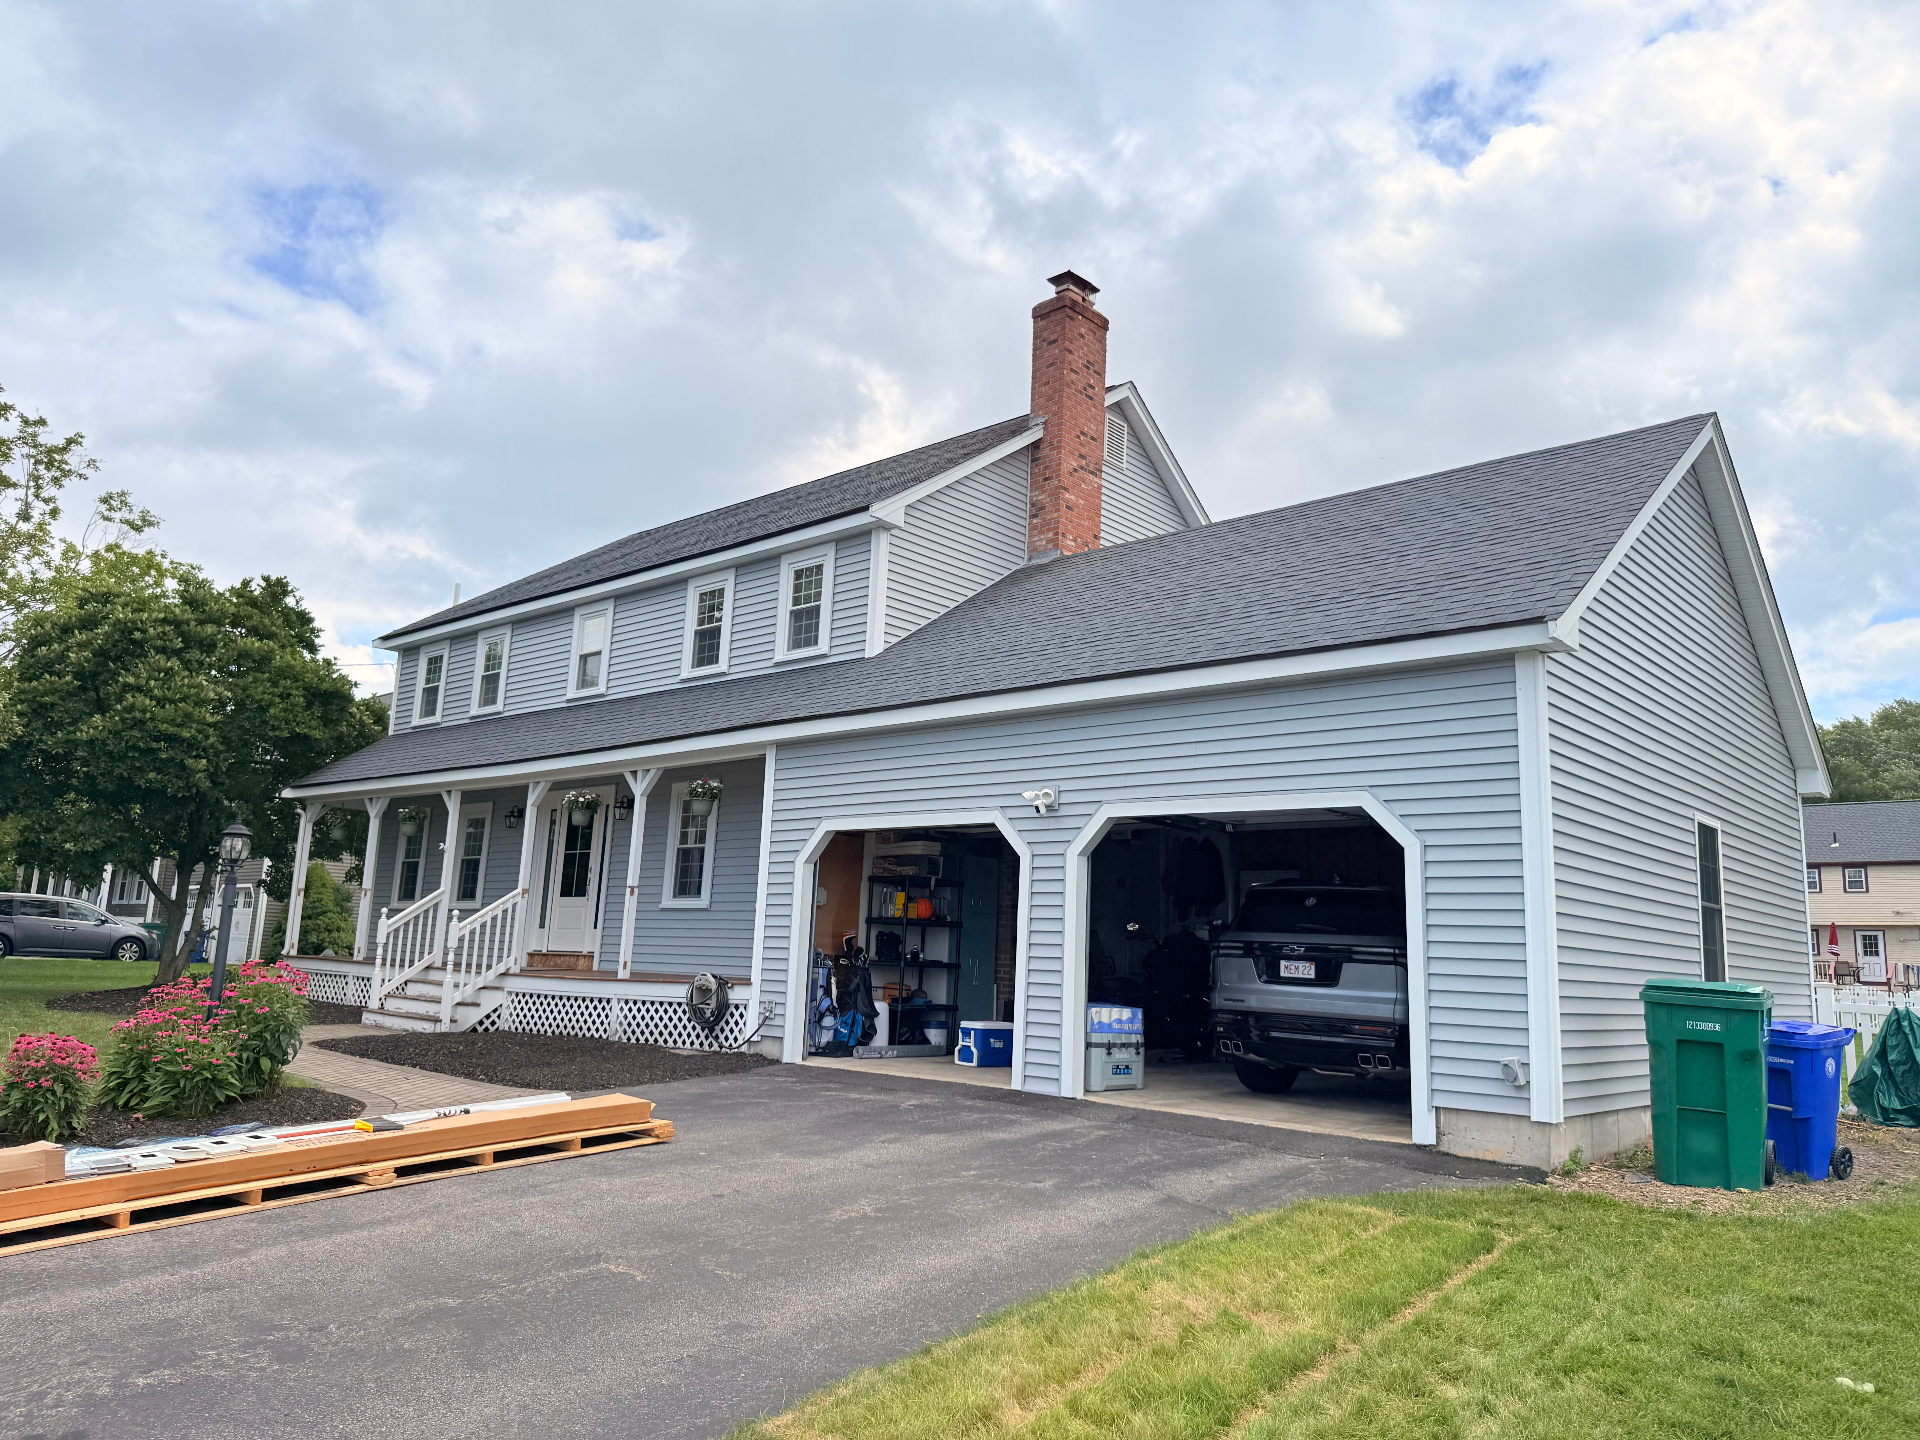
Driveway & garage side
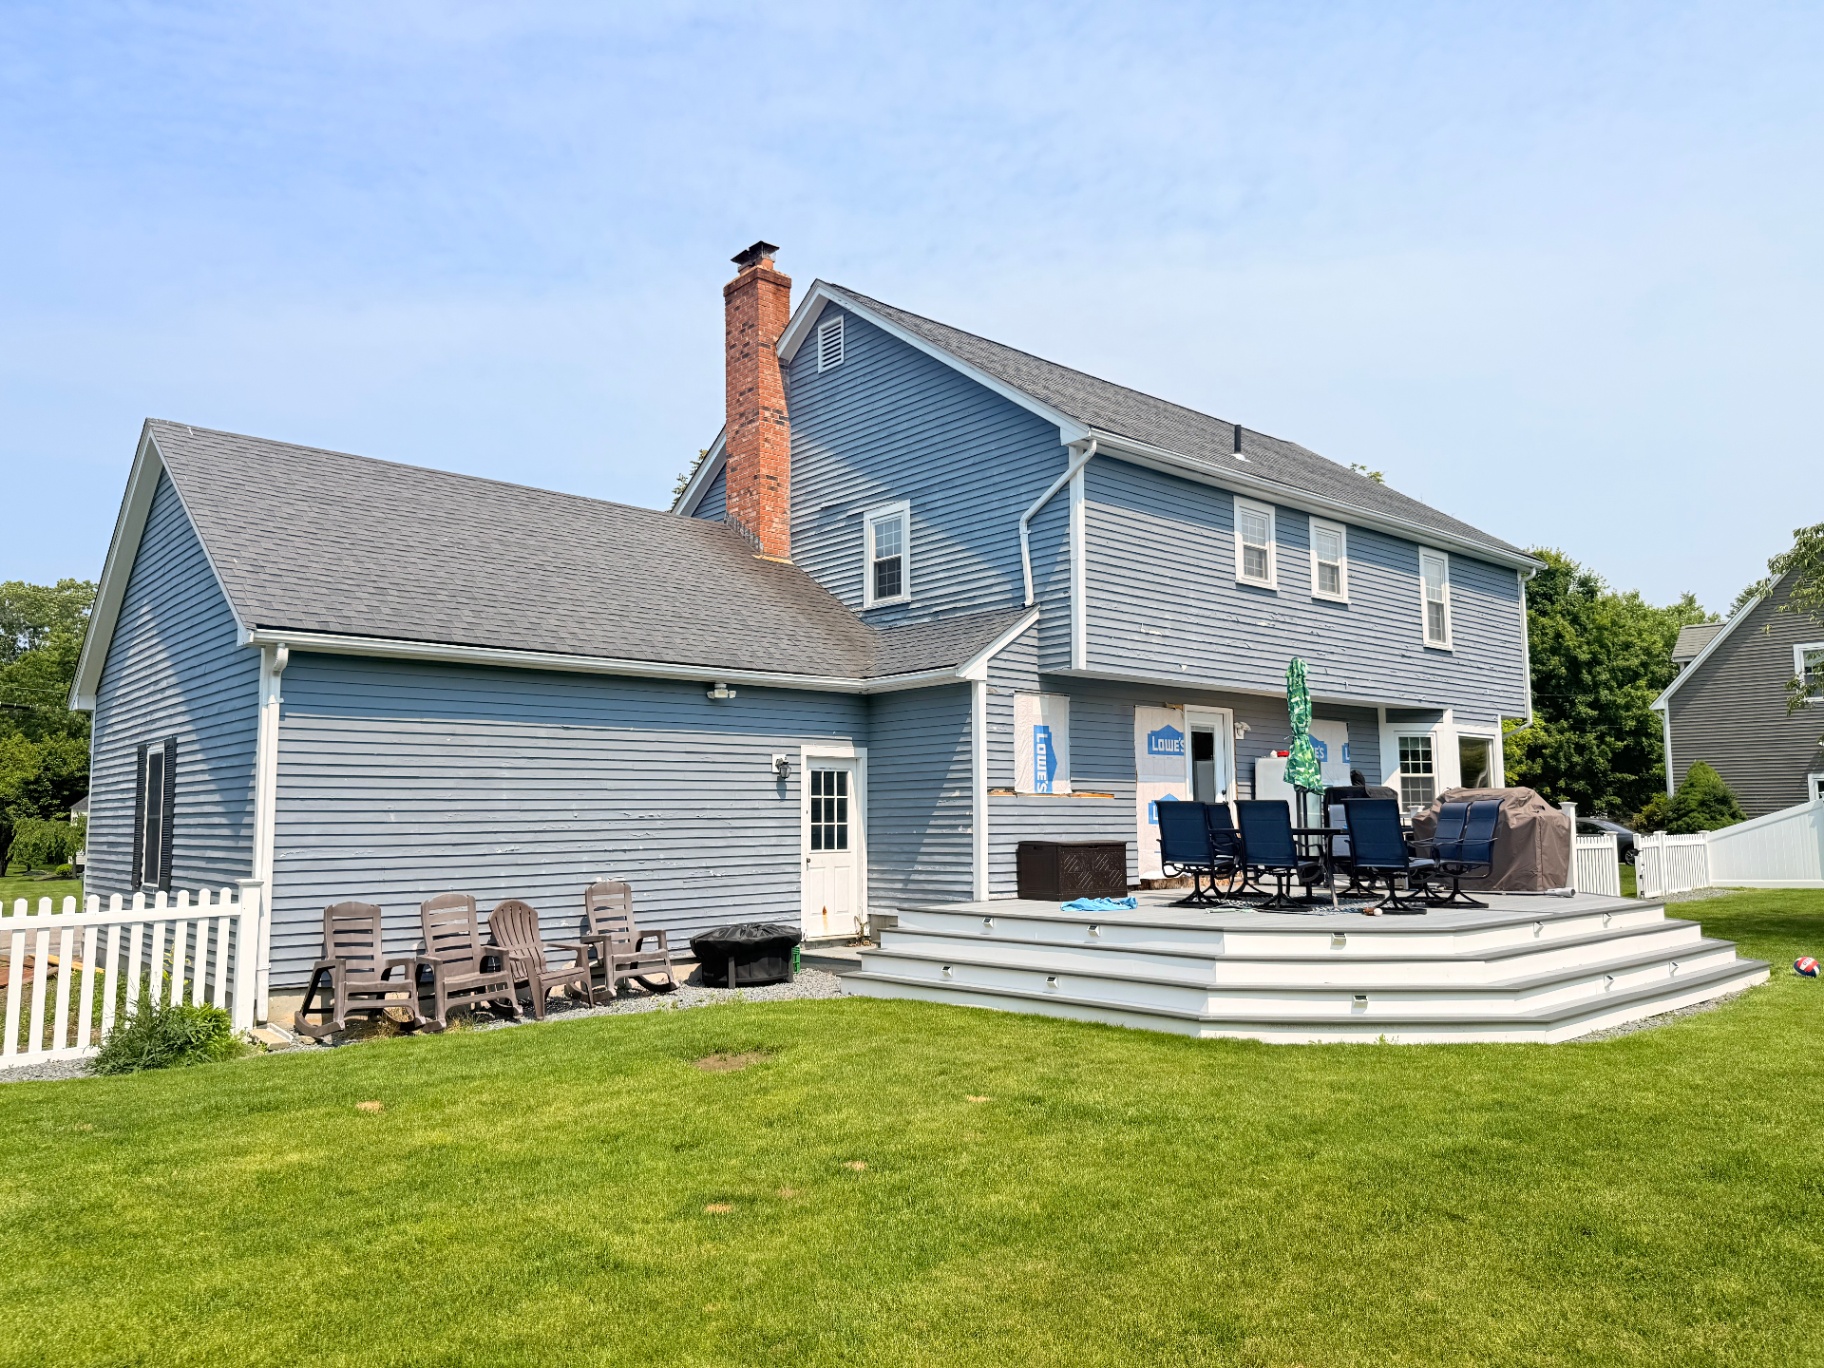
Rear of house & deck

Stripping the Cedar Clapboard
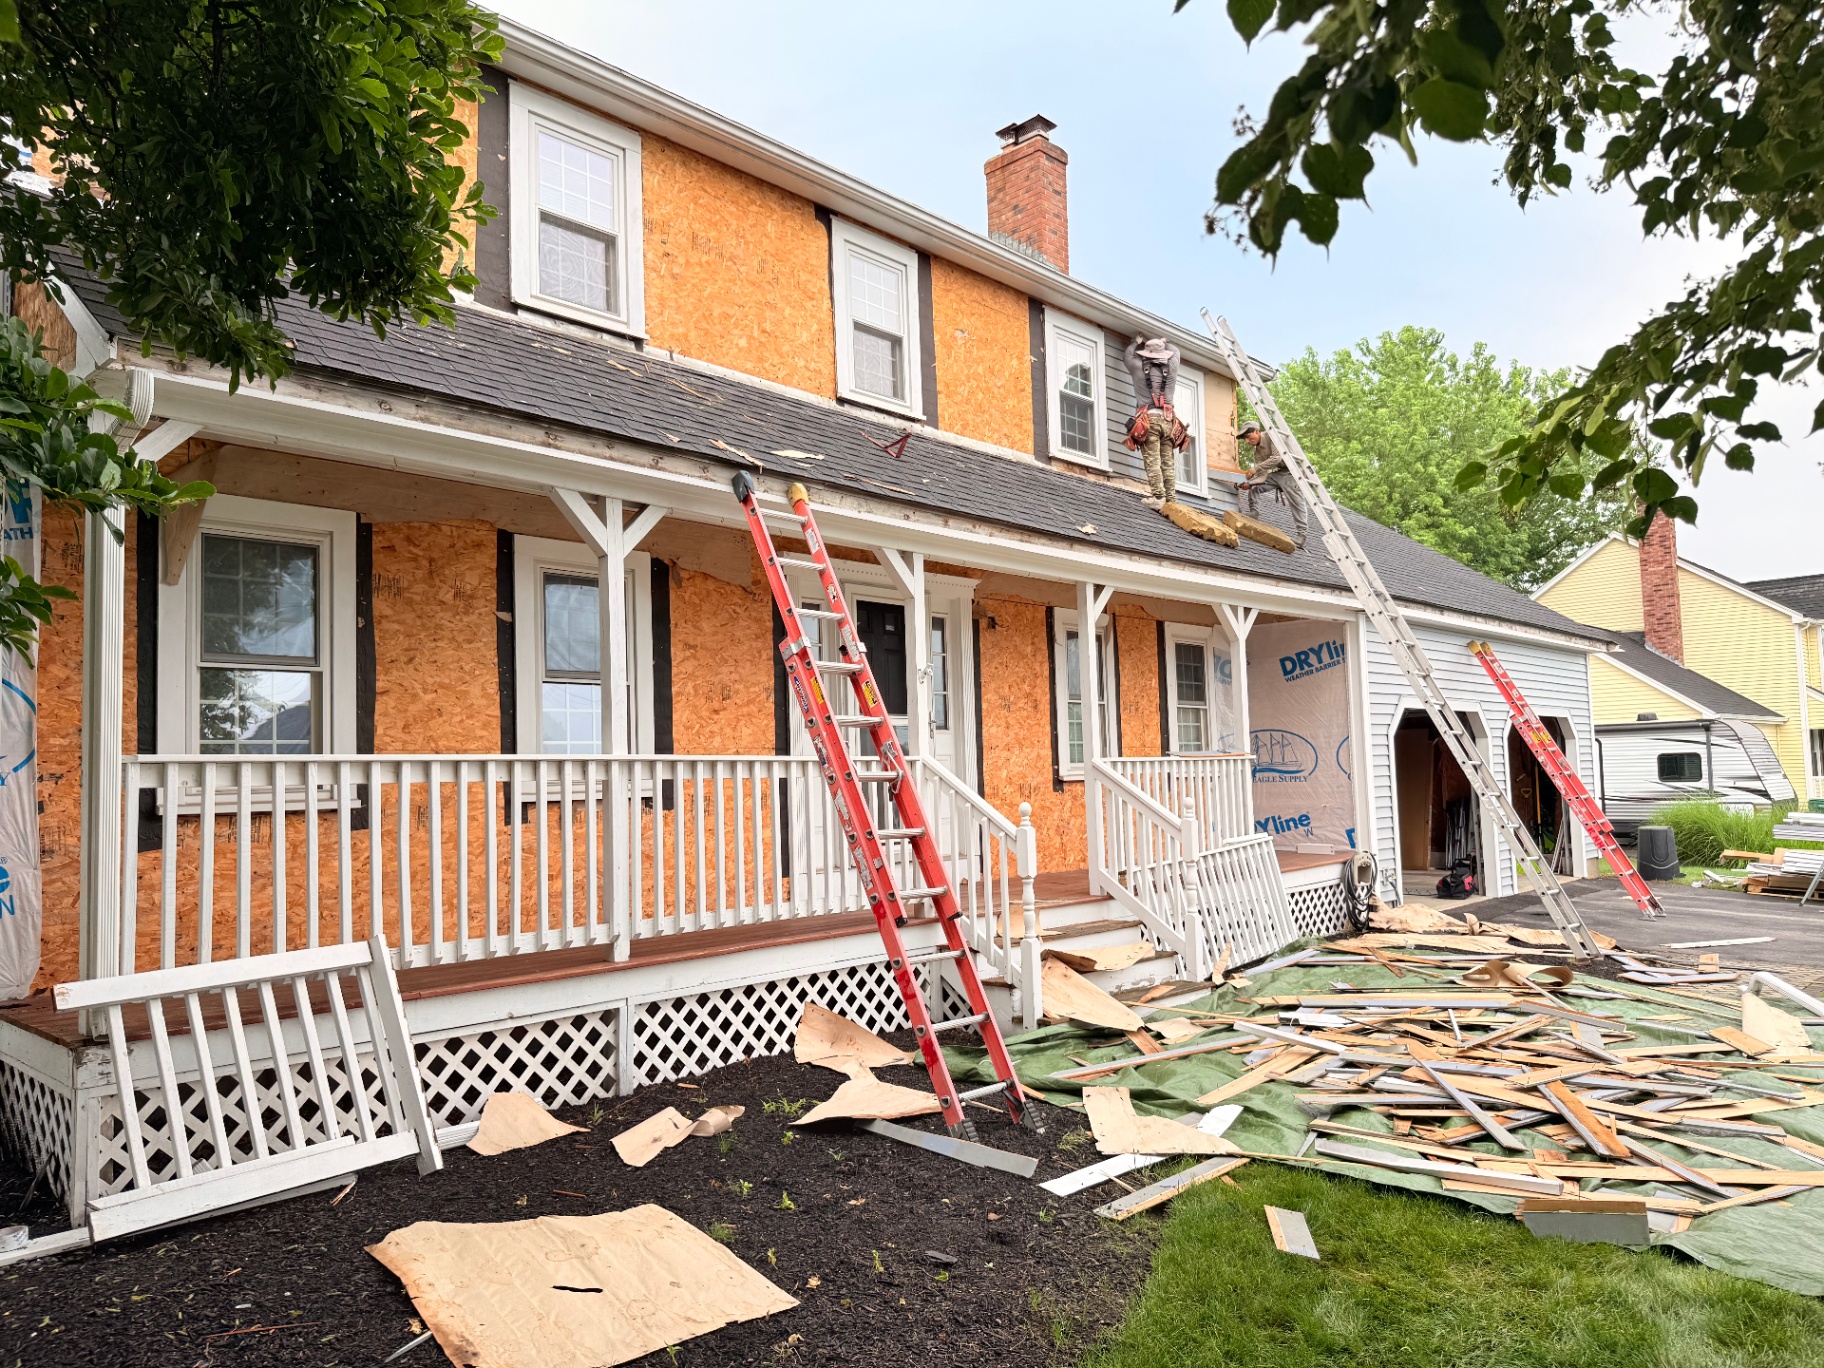
The first phase was a full tear-off of the existing cedar clapboard. Our crew worked section by section, carefully removing every board and exposing the sheathing underneath. What we found confirmed our concerns — multiple sheets of plywood were soft, delaminated, and compromised by years of trapped moisture.
This is one of the dangers of aging cedar siding. While the exterior may look weathered but intact, water can wick behind the boards through nail holes, cracks, and failed caulk joints, silently rotting the structural sheathing over months and years.
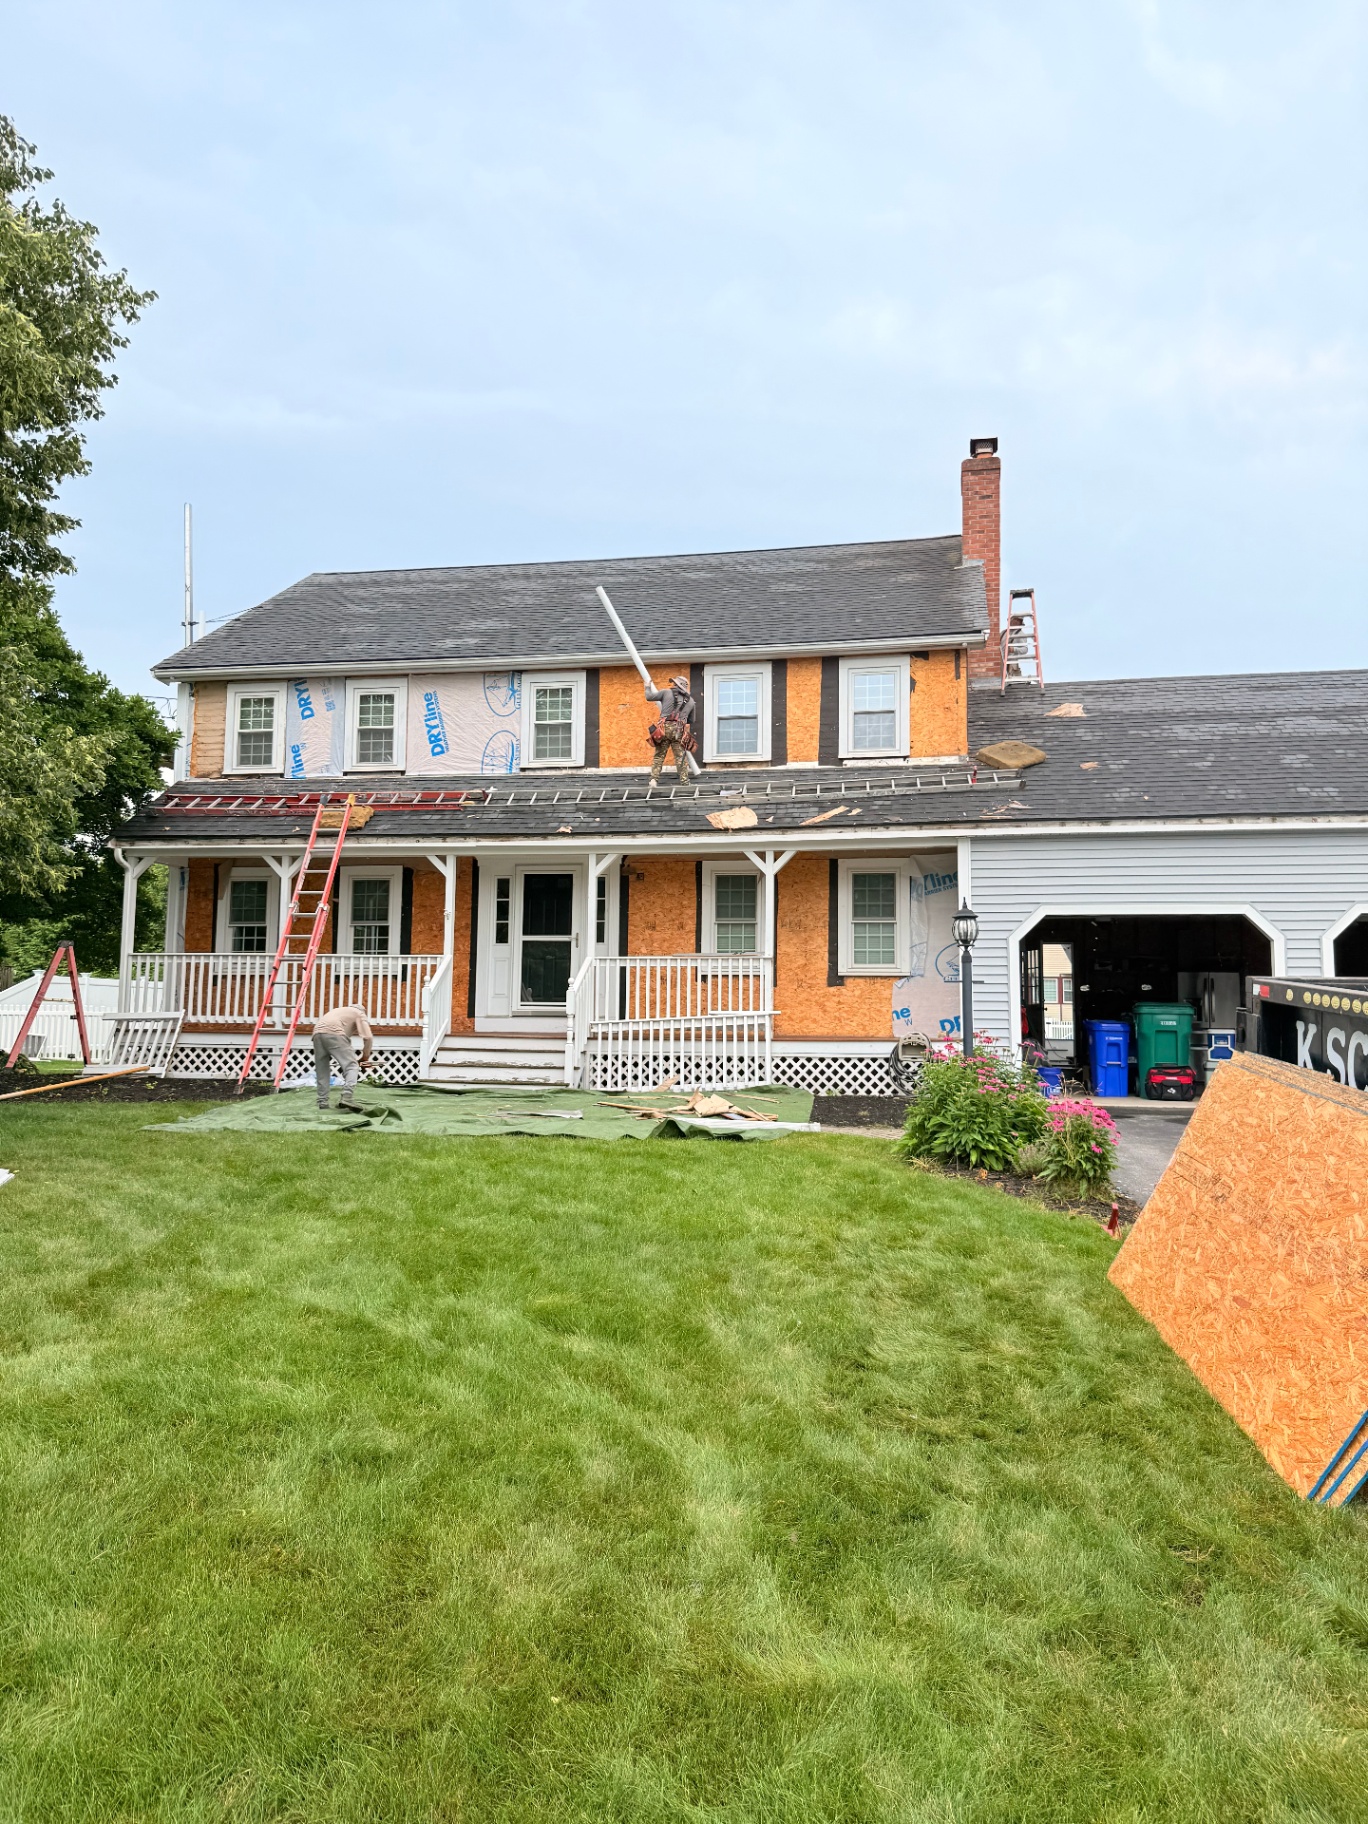
Replacing Rotted Plywood Sheathing
With the old siding off, we replaced every compromised sheet of plywood with new structural-grade sheathing. This step is critical — installing new siding over rotted sheathing is like putting a fresh coat of paint on a crumbling wall. It might look good for a while, but the problems underneath will only get worse.
We inspected every square foot of the house wrap and sheathing, replacing sections as needed and ensuring the entire envelope was solid, flat, and ready for the new siding installation.
Vinyl Siding Installation
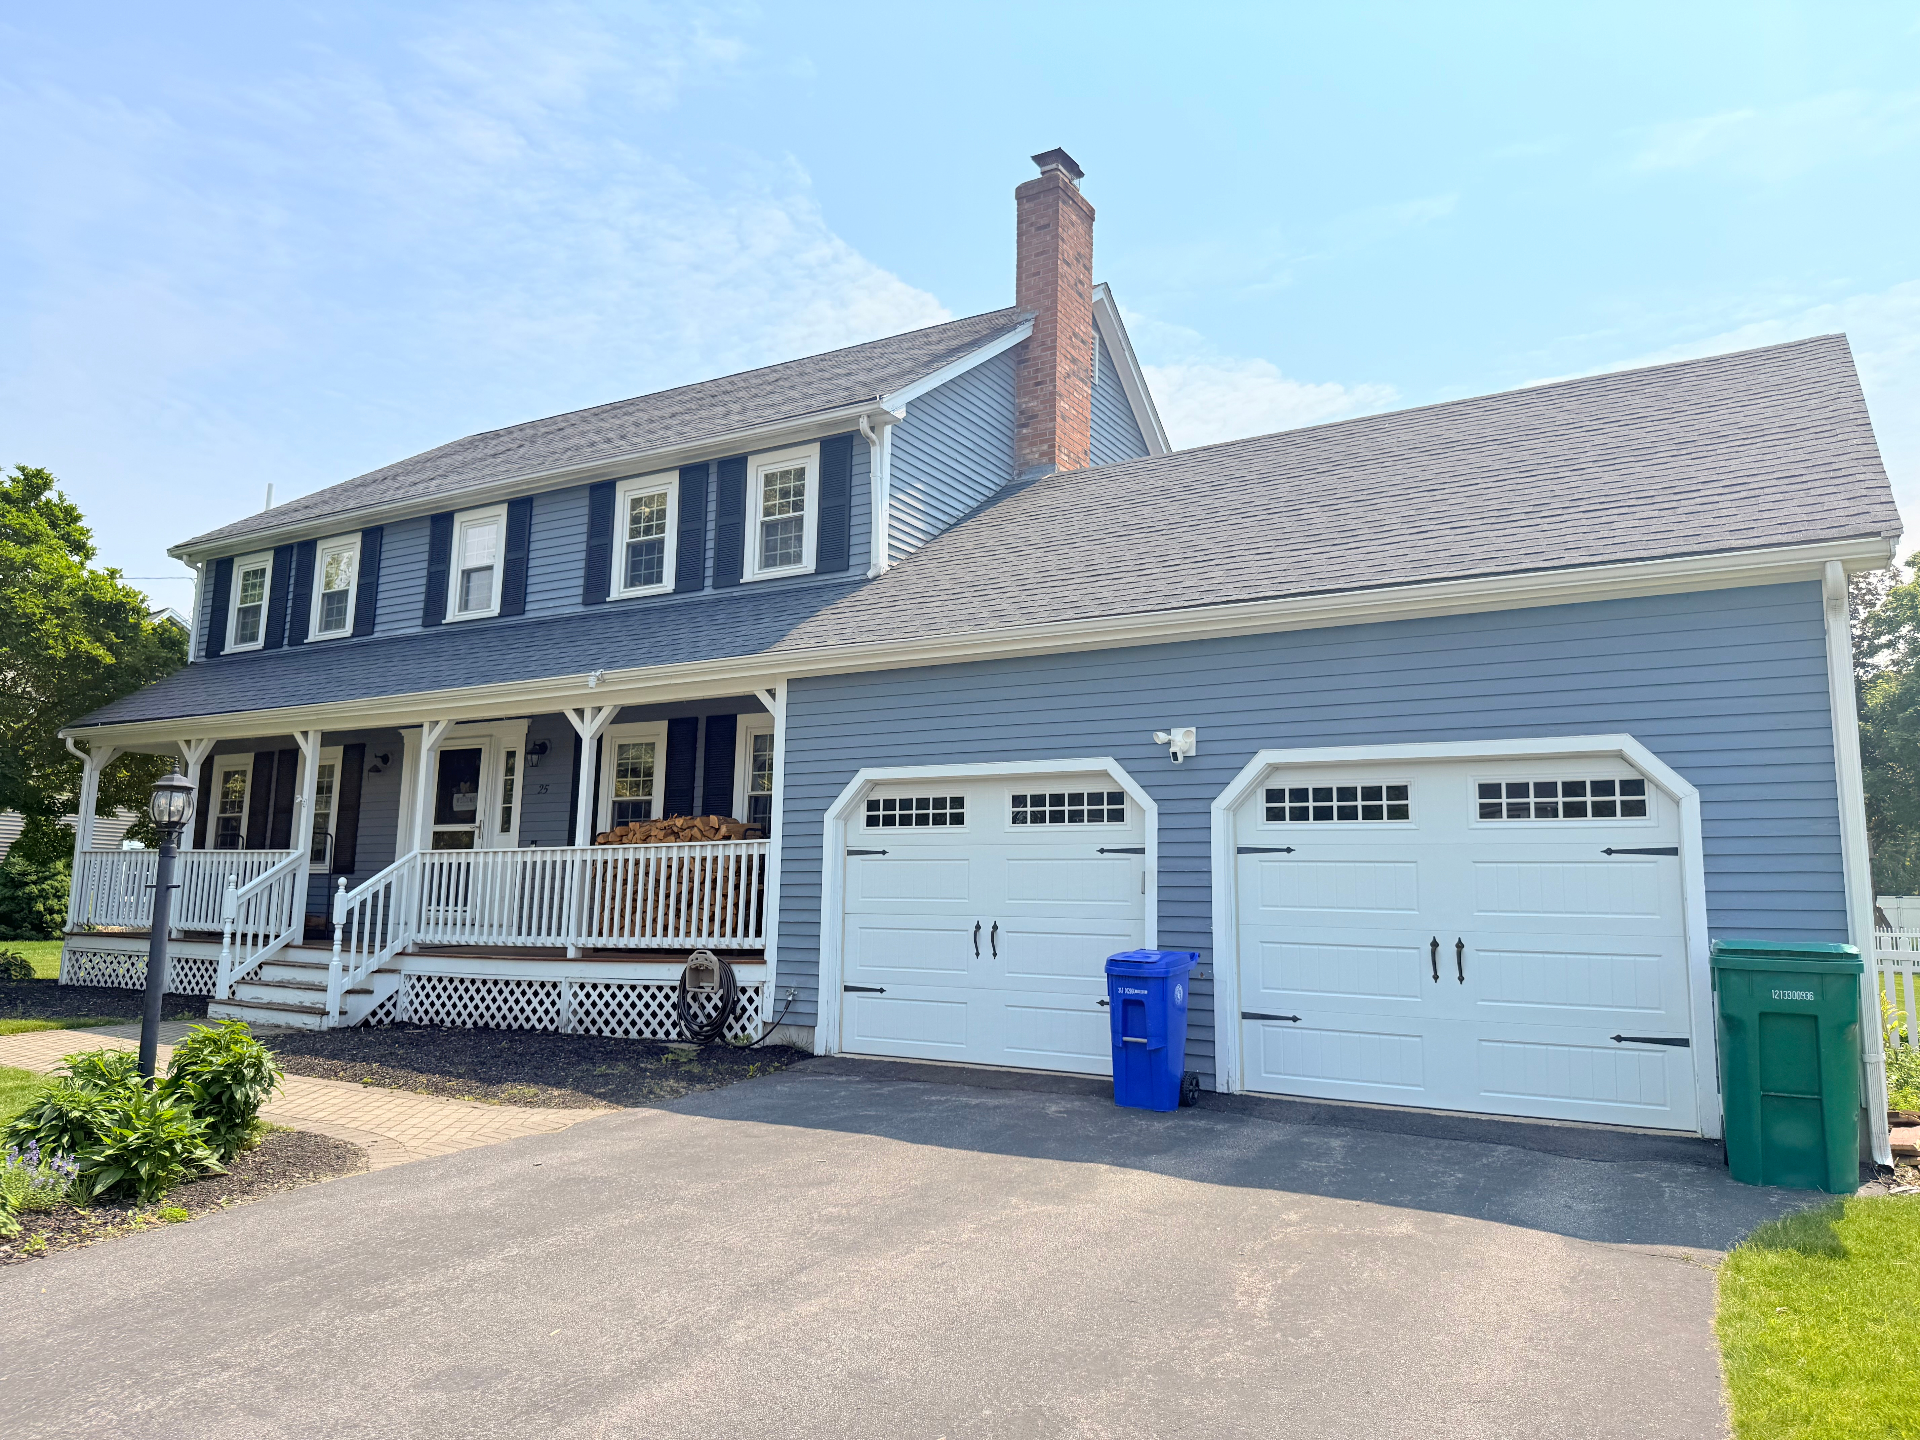
The homeowners chose a clean, light gray vinyl clapboard siding that complements the home's colonial architecture, white trim, and brick chimney. Vinyl was the perfect choice for this project — it delivers the classic clapboard profile they loved without the maintenance burden that had led to the cedar's decline.
Key details of the siding installation:
Cleaning Up the Rear
The back of the house received the same attention as the front. We made sure the new siding transitioned cleanly into the existing deck, patio area, and other property features. The result is a cohesive look from every angle — no more mismatched or deteriorating sections.
The Result
The transformation speaks for itself. What was a tired, maintenance-heavy exterior is now a crisp, clean colonial that looks brand new. The light gray siding brightens the entire property, and the homeowners can enjoy their home's curb appeal without ever picking up a paintbrush again.
Project Details
Planning a siding project? Get a free estimate or call (401) 300-0323.